How To Preserve A Snowflake [4 Easy Ideas!]
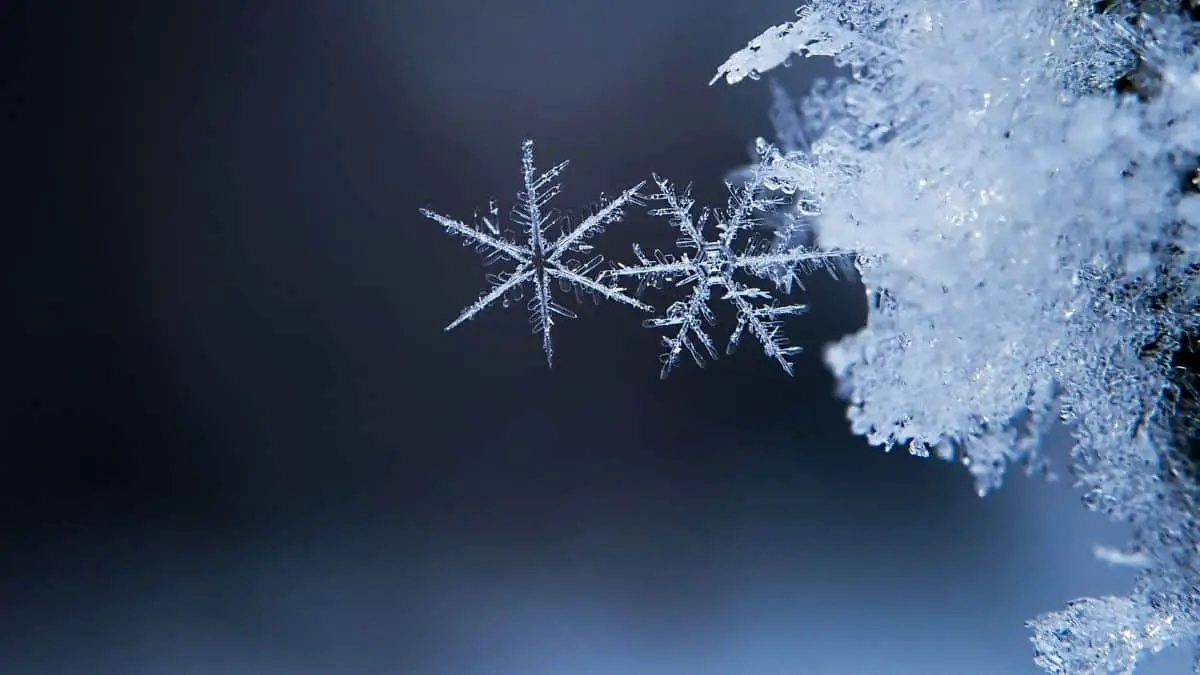
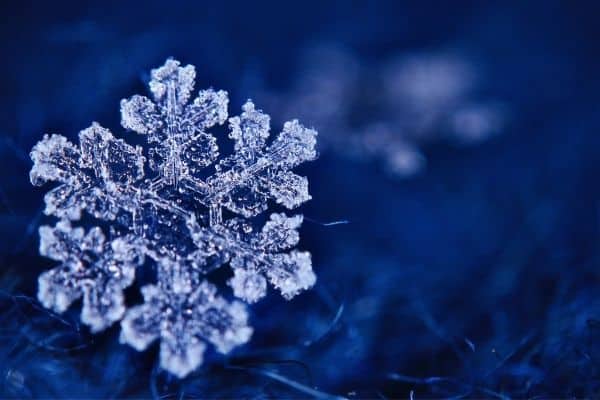
Have you ever looked closely at a well-formed snowflake and wished that you could make it last? Have you ever wanted to look at a snowflake under a microscope or capture a stunning photo of a real snowflake? The steps to preserve or even create a snowflake are simple, using readily available materials that you may even have at home already. Don’t live where it snows? No problem! You can make your own real crystal snowflake, or create a realistic paper replica and preserve it as well.
Preserving a snowflake is as simple as making an impression with superglue or hairspray.
Related post: 5 Quick and Easy STEM Projects for Kids
Simple Method for Preserving a Snowflake
If you’ve ever wanted to preserve the beauty of a snowflake forever, you are in luck! The process is relatively simple and approachable. To preserve a snowflake, you’ll just need a few specific tools and snow.
The method summarized below is based on this more in-depth tutorial from CalTech or this approach presented by Science Friday.
Materials:
- A microscope slide and cover slip (or two slides)
- Liquid (not gel) superglue, preferably unopened; or hairspray
- Dark paper or cloth to catch your flake
- Access to a freezer or protected cold space such as an unheated garage
- A paintbrush or toothpick
- Warm clothes
- Falling snow
For more in-depth instructions, see the methods linked above, or these simple video instructions. In a nutshell, you’ll want to cool your equipment (slide, cover slip, superglue or hairspray, paintbrush or toothpick, and paper) in a freezer for at least an hour before you hunt a flake. Keep your slides and superglue or hairspray handy so that you can save the flakes before the melt.
Use dark paper (construction paper is great) or cloth to catch a snowflake. Paper and cloth are poor heat conductors, and the dark color provides contrast so you can choose a good crystal. Once you have captured some falling snowflakes, prepare your slide with a thin layer of liquid superglue or hairspray and use a paintbrush or toothpick to transfer your snowflake to the prepared slide. If you’re using the superglue method, place some more glue on top of the crystal, place your cover slip or second slide on top, and put it in the freezer or a cold and protected area for at least a few hours to harden.
Once the impression has set, you can observe the snowflake at room temperature under your microscope! If you don’t have a microscope, you can also look at them with the naked eye. There are also affordable adaptors that convert a smartphone into a microscope, which opens up a world of possibilities.
Alternative Methods for Preserving a Snowflake
Looking for something that doesn’t require preservation or a microscope? No worries, there are some other fun ways to view and preserve a snowflake.
Photography
Snowflake Bently, born in 1865, became famous for photographing thousands of snowflakes. Bently marveled at the beauty of these small crystals, with over 1,600 photographs, he had never seen two that were the same. Check out snowflakebentley.com for articles written by the man himself and a photo gallery (for inspiration, of course).
Modern photography methods make photographing snowflakes a lot more approachable, but no less fun! Best results will come from using a micro lens (one designed to focus on small objects at a close distance). If you have a digital or traditional SLR camera with the appropriate lens, this is a perfect set-up. There are also many options for purchasing a micro lens adapter for a smartphone camera, making it easier than ever to photograph the natural beauty of snowflakes.
A few tips: keep your device as cool as possible; use a cooled, dark surface for contrast (a dark piece of construction paper or cloth works well); and wear insulated clothing to protect the snowflakes from your body heat.
Making and Preserving Realistic Paper Snowflakes

We all remember making paper snowflakes as kids, folding a piece of paper over and over and cutting out shapes to make a lacy-looking flake. But they never look quite right, and paper dries, yellows, and crumbles over time. So how do we make and preserve something more realistic?
Your paper flakes look a little off because natural snowflakes have six points (or very rarely three), rather than the four your standard paper creations typically end up with. Instructables living has a really nice tutorial with step-by-step photo instructions that illustrate how to fold and cut a piece of paper to make 6-sided snowflakes. I love this example because the gallery of cutout snowflakes looks so much like Snowflake Bently’s photograph gallery. They really do look like the real thing!
If you want to preserve your paper snowflakes, there are several simple and effective methods available. One option is to mix 1 part room temperature water, 2 parts cornstarch or flour starch, and 2 parts white glue, then paint your snowflake with the paste and dry. Another option is to dip them in wax or resin, or frame it.
Make a Real Crystal Snowflake
If you don’t live where there is snow, it’s summer, or you just like a good experiment, try making your own snowflake crystals! The methods for creating real crystals are a little more involved than simply capturing and documenting a snowflake that falls from the sky, but it also allows you to watch the crystal grow and learn about the snowflake formation process.
There are a few ways to go about making snowflakes, but all involve the same basics: you need a jar to create a cloud-like environment, string or pipe-cleaners to act as a base for crystal formation, and a liquid solution (water, or water plus borax as two examples) as the base for water-vapor. The crystals form as hot water droplets adhere to the base material and cool.
Science Friday has a nice tutorial that includes instructions for collecting, preserving, and creating your own snowflakes. Their snowflake creation method uses a jar, pipe cleaners, string, water, and borax.
This method from CalTech uses similar starting materials, but no borax. I like the method because it includes nice explanations with illustrations of the crystal formation process. By following along with each step, you can learn how and why your snowflake grows in certain ways!
Have Fun!

Snowflakes are both beautiful and complex. They are plentiful (I’m looking at 3+ feet of snow outside of my window at the moment), but ephemeral, delicate, and challenging to capture. But the results when you finally get a good one are both rewarding and beautiful. So have fun playing with these natural wonders!


