Cheap STEM Activities with Household Items: STEM-at-Home!
If you’ve ever seen Lemony Snicket’s A Series of Unfortunate Events, you’ll recall how Violet, the older sister, ties her hair with a velvet ribbon every time she needs to come up with an invention. The great thing about her ideas is that they are created with ‘mostly’ common household items.
If you are looking for cheap STEM activities (or FREE!), this article supplies you with a series of STEM-at-home activities to make your stay-at-home lockdown much more exciting. The best part is? All of the materials are typical items you’ll find at home, except for Violet’s velvet ribbon.
Related post: Quick STEM Activities for 5th Grade Students
Cheap STEM Activities
Balancing Bots


If you’re looking for a really cute buddy who is also amazing at balance, try making Buddy the Balancing Bot. This activity is quick, easy, and entertaining, and tosses in some basic physics concepts like the center of mass, balance, and rotation. Buddy the Balancing Bot will balance on your fingers, ledges, and anything else around the house you want to experiment.
You’ll need:
- 2 wooden skewer sticks
- A toothpick
- A wine cork
- 2 small balls of clay
- A dash of hot glue
- 2 googly eyes (just for fun)
Procedure:
- Insert the toothpick in the center of the bottom of the cork.
- Push one of the skewers into the side of the cork, angled down. You can go as high up as you want since each position will show you different balances.
- Repeat with the other skewer on the other side in the same spot.
- Roll your clay into two small balls about the size of a large marble. You can also play around with the sizes once you get the hang of Buddy.
- Hot glue the googly eyes towards the top of the cork to give him personality. You can even draw a little smile just underneath.
- Now Buddy is ready to balance. Have fun!
Tesselation Art
Tesselations are repeated patterns, and they can be found everywhere. From human activities such as bricklaying, bathroom tiles, and wrapping paper, to nature tessellations like beehives, scales on a snakeskin, and scotes on a sea turtle shell. Mathematicians find tesselations fascinating as well as artists. You can make a fun, abstract piece of art by creating your own tesselation.
You’ll need:
- Scissors
- Square paper (10cm)
- Crayon
- Watercolor
- Sticky tape
Procedure:
- With your scissors, cut a shape out of one side of the 10cm square paper.
- Without rotating or spinning either piece, put the cut-off piece on the opposite side of the square and tape it along the edge. The straight sides of the cut piece and the square match and line up with one another.
- On another straight side of the square, cut a shape, then repeat number two. It must match the opposite straight side of the square. Continue this until you have a tessellation shape you are happy with.
- Take the watercolor paper and trace an outline of your tesselation shape onto it. Trace it over and over until the paper is filled with the shape. You won’t need to rotate or spin the shape to make the outlines fit together.
- Paint each of the shapes with watercolor and watch the wax resist the liquid paint.
- Frame your picture once it’s dry!
Watergun Math
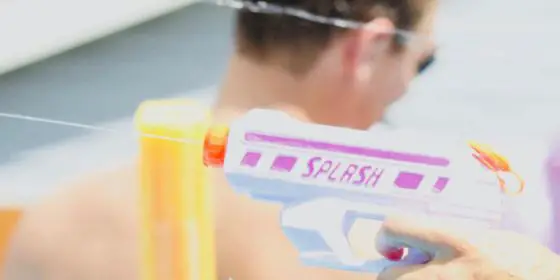
If your kids need an exciting outdoor STEAM activity and they love incorporating water guns, the Watergun Math game will be a hit. This game can be used in so many different ways, but this example focuses on math concepts. The main goal is to shoot down cups with the water gun and gain points by answering the math question correctly.
For younger kids, use simple addition or subtraction. For elementary-aged kids use multiplication, division, or geometric shapes. And for the older kids, you can incorporate algebraic equations with a splash (pun intended) of PEMDAS. Start with the basics first, and use the Watergun Math game in place of flashcards and timed memorization!
You’ll need:
- Plastic cups
- Permanent marker
- Water guns
- Water
Procedure:
- Choose how many math problems you want and use the same number of plastic cups. Turn the cups upside down and write one problem on each cup with the permanent marker.
- Fill the water guns with water.
- Place each cup in a single row and upside-down along the edge of a table, fence, etc. Leave a little spacing between each cup.
- Depending on how far the water gun will shoot, be sure you’re standing far enough back to feel challenged, but close enough so there is enough pressure from the water gun to push the cup down.
- Choose a cup and shoot. If you get the cup down, answer the math question. If you get it right, you get a point. If it’s wrong, then it goes back into the lineup.
- Continue until all the cups are down. Whoever has the highest score wins.
You can also play this game alone, without scores, and with any other subject. An extension would be to add a secret object underneath a cup, and whoever shoots that cup down gets a few extra points as a bonus.
“Pond, James Pond” Waterscope
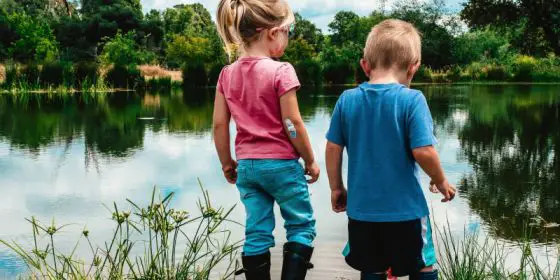
This idea comes from Bill Nye, the Science Guy, and can be made from typical household items. If you live near a pond or a still body of water, you’ll know that it can be difficult to see under the water from the surface. Many times, the surface reflects the sky and surroundings, which blocks your view of the world beneath. A waterscope helps to reveal the mystery so you can observe the underwater habitat and perhaps see some creatures.
You’ll need:
- Plastic wrapping
- Rubber bands
- Juice can (preferably the kind with aluminum ends that are removed easily)
- Packing tape
- Nature sketchbook (optional)
Procedure:
- Remove both ends of the juice can, whether it’s prying off the ends or using a can opener. Make sure there are no sharp edges sticking up. You can use a hammer to push them down. Cover the edges with tape to stay extra safe from getting cut.
- Pull and tear enough plastic wrap to cover tightly over one opening.
- Place the rubber band around the wrap so it holds tight.
- Slip the end with the plastic wrap into the water and look through the open end. You should be able to see past the surface into the water.
- If you’re using a nature journal, sketch what you see.
If you’d like to make water binoculars. Make two waterscopes and tape them together.
Bending Light
Have you ever considered bending light? Me neither, until I tried this activity. What you’ll see is not a sleight of hand or trick of the light, so to speak, but because the water stream acts like a mirror reflecting the light beaming out of the flashlight. On a tiny level, the light is actually moving around inside of the water, almost like it’s captured. Therefore, the light flows wherever the water flows.
You’ll need:
- An empty soda can
- A bright flashlight
- Sharp pencil
Procedure:
- Have a grown-up poke a hole in the bottom side of the can with the sharp pencil. The adult will need to push the sharp edges inside the hole so no one gets cut.
- With your finger covering the hole, fill the can with water.
- Turn off the lights, and with the can over the sink turn the flashlight on over the top of the can.
- Take your finger off of the hole and you’ll see a beam of light where the water streams lands in the sink.
Stop Motion Animation
Stop motion animation is a filming technique that makes inanimate objects appear to be independently mobile. It gives them more personality and gets the creator’s imaginative wheels spinning.
When doing stop motion animation you’re choosing characters in a story, placing it in front of a camera and taking a picture, then moving it a tiny bit to take another picture. You’re continuously moving and snapping, moving and snapping until your story is finished and you have a fluid playback. It’s so much easier than it sounds.
You’ll need:
- A background (a white wall or a foam core board like for science fair projects works well)
- A white floor (can also be a foam core board)
- Collections of characters (animal models, Lego pieces, small stuffed animals, figurines, illustrations that stand up)
- Smartphone or tablet (to take pictures in the app)
- Stop Motion Animation app (free by Cateater – Android or iOS)
- Tripod
- Bright, natural lighting
Procedure:
- Set up the backdrop so the background is propped up and the flooring is at a right angle along the edge of the background. It needs to be in an area with plenty of lighting and no shadows, like next to a very bright window.
- Select the characters.
- Situate the smartphone/tablet in front of the backdrop and make sure the image doesn’t show the outside of the backdrop.
- Start the Stop Motion Animation app and follow the prompts.
Explore more stop motion with kids at The Indigo Teacher!
Glow Germs
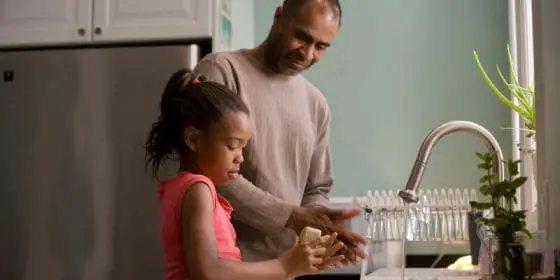
Germs are everywhere! This activity combines life science, technology and chemistry to see how clean your hands really are after you wash them. We’ve found from so much handwashing that there are difficult parts of the hands that are tough to scrub, like between the fingers, under your fingernails, and in the folds and lines of joints.
Glow Germs uses a ‘fake germ’ mix that brightens (literally) the icky parts of your hands under a UV light (blacklight). After washing your hands, see how clean you got your hands with the UV light!
You’ll need:
- A small bottle of hand sanitizer (if you can find one!)
- Yellow highlighter (non-toxic)
- UV flashlight
- Pliers
- Phone camera
- Very dark room
- Sink
- Soap
- Running water
- Clean towel
- Someone closeby for assistance
The day before: Making the fake glow germs
- Remove the lid from the hand sanitizer bottle, then use the pliers to carefully pull the tip out of the highlighter.
- Slip the highlighter tip into the sanitizer bottle, replace the lid, and shake until you see the ink spreading through the liquid.
- Let the bottle sit overnight so the liquid sanitizer absorbs as much of the highlighter as possible.
The next day
- Take your assistant, the UV light, and your bottle of glow germs into a dark room.
- Squirt a nickel-size amount of germs onto the palm of your hand. It should almost immediately start to glow. Rub the liquid all over your hands until they have an even glow.
- Let your hands dry, then have your assistant take a picture of your glowing hands.
- Wash your hands really well, singing Happy Birthday to You or another song lasting for 20 seconds.
- Go back into the dark room and look at your hands under the blacklight. Notice whether or not your hands are glowing – is the glow completely gone?
- Take a photo of your newly washed hands from under the UV light. Compare the before and after pictures.
Final Thoughts
STEM activities don’t have to be expensive, especially when you have plenty of household items on hand. Each of these projects can help turn your stay-at-home into a STEM-at-home. Soon enough, you’ll be looking at objects in your house from a different and more creative perspective.


